MSG-3 MSI Analysis
MSG is the acronym for Maintenance Steering Group and it is basically a structured process for optimally determining, based on reliability principles, the required maintenance intervals for new aircraft and/or engines. It was initially developed by the aviation industry, but its great flexibility allows it to be adapted to many other contexts.
MSG-3 is developed before the item being considered enters into service. It is usually a top down analysis in which, little by little, each system failure mode is examined. Thanks to a decision-logic scheme, the optimal maintenance plan required to make the aircraft safer at the optimal effort and cost is derived.
Objective: determine the scheduled maintenance tasks and intervals for systems and powerplant using the technical data available.
For the MSI analysis, these steps must be followed:
Identify the MSIs (Maintenance Significant Items)
Analyse each MSI according to the logic diagram
Answer the questions with YES or NO until get to a recommendation
Assign tasks according to the analysis performed
MSI (Maintenance Significant Items)
MSI (Maintenance Significant Item) selection: Now the system items whose failure may be critical for the system are identified to be treated in the analysis.
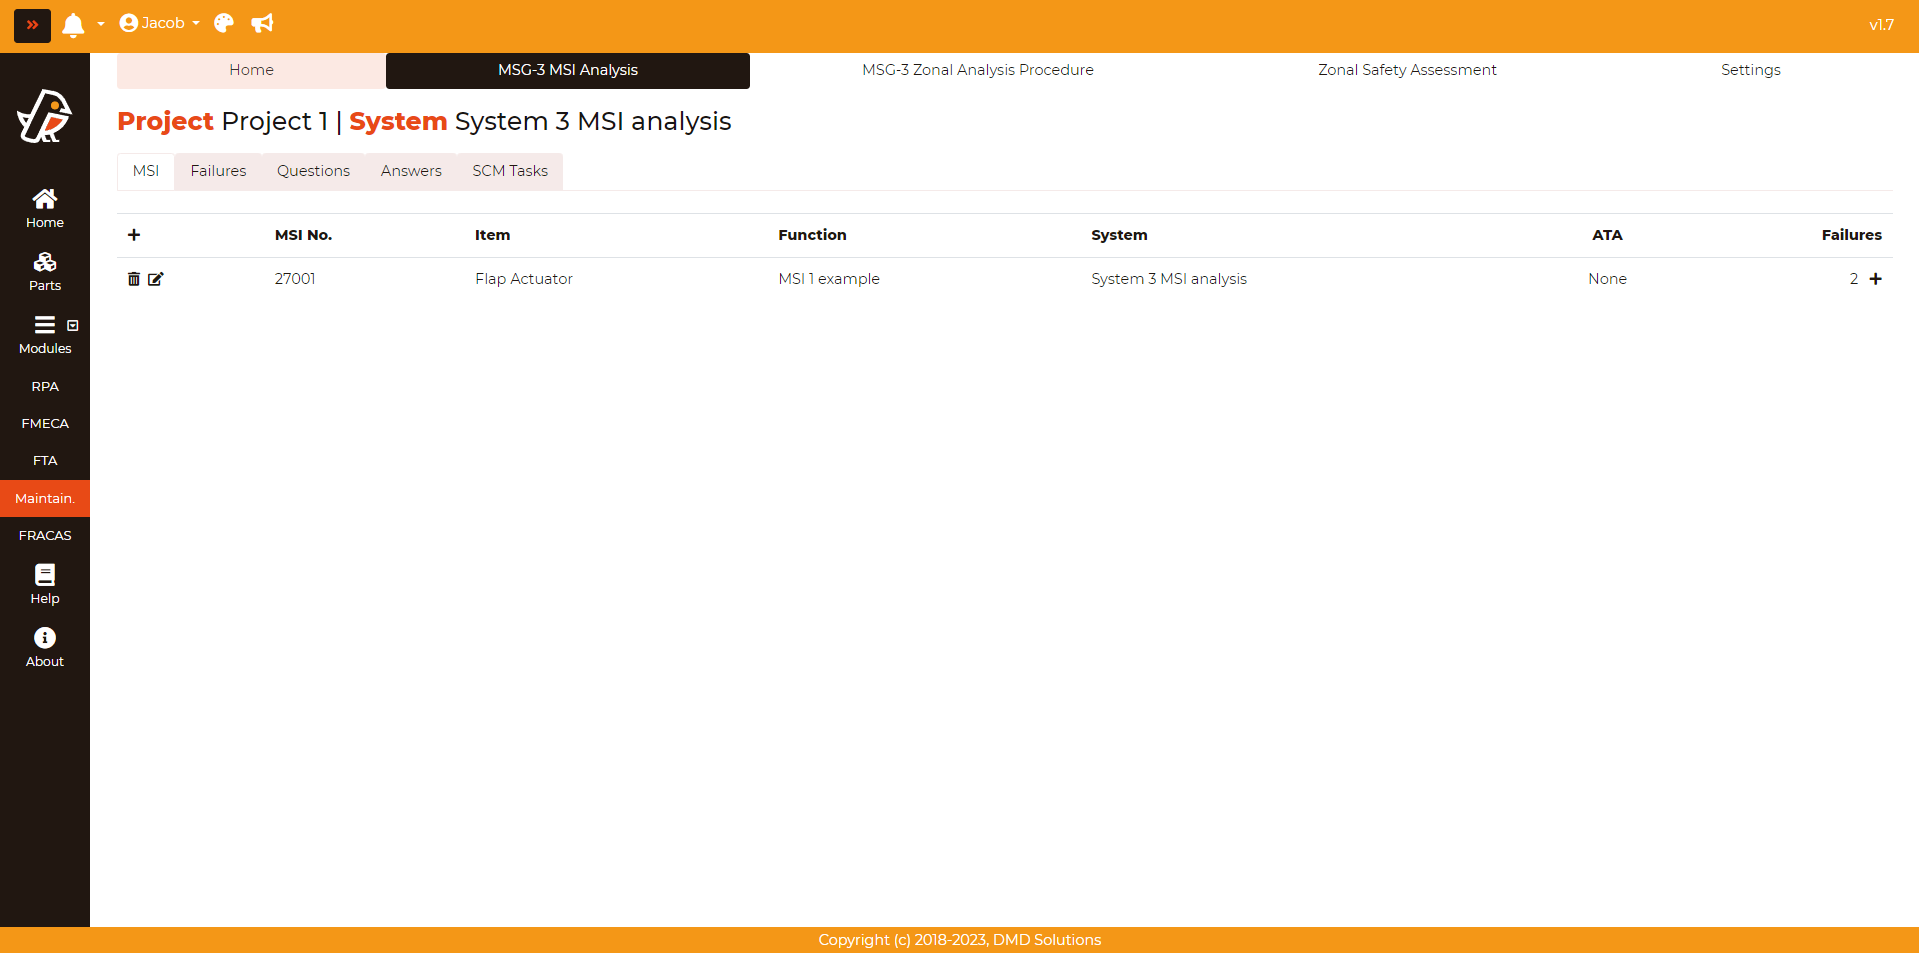
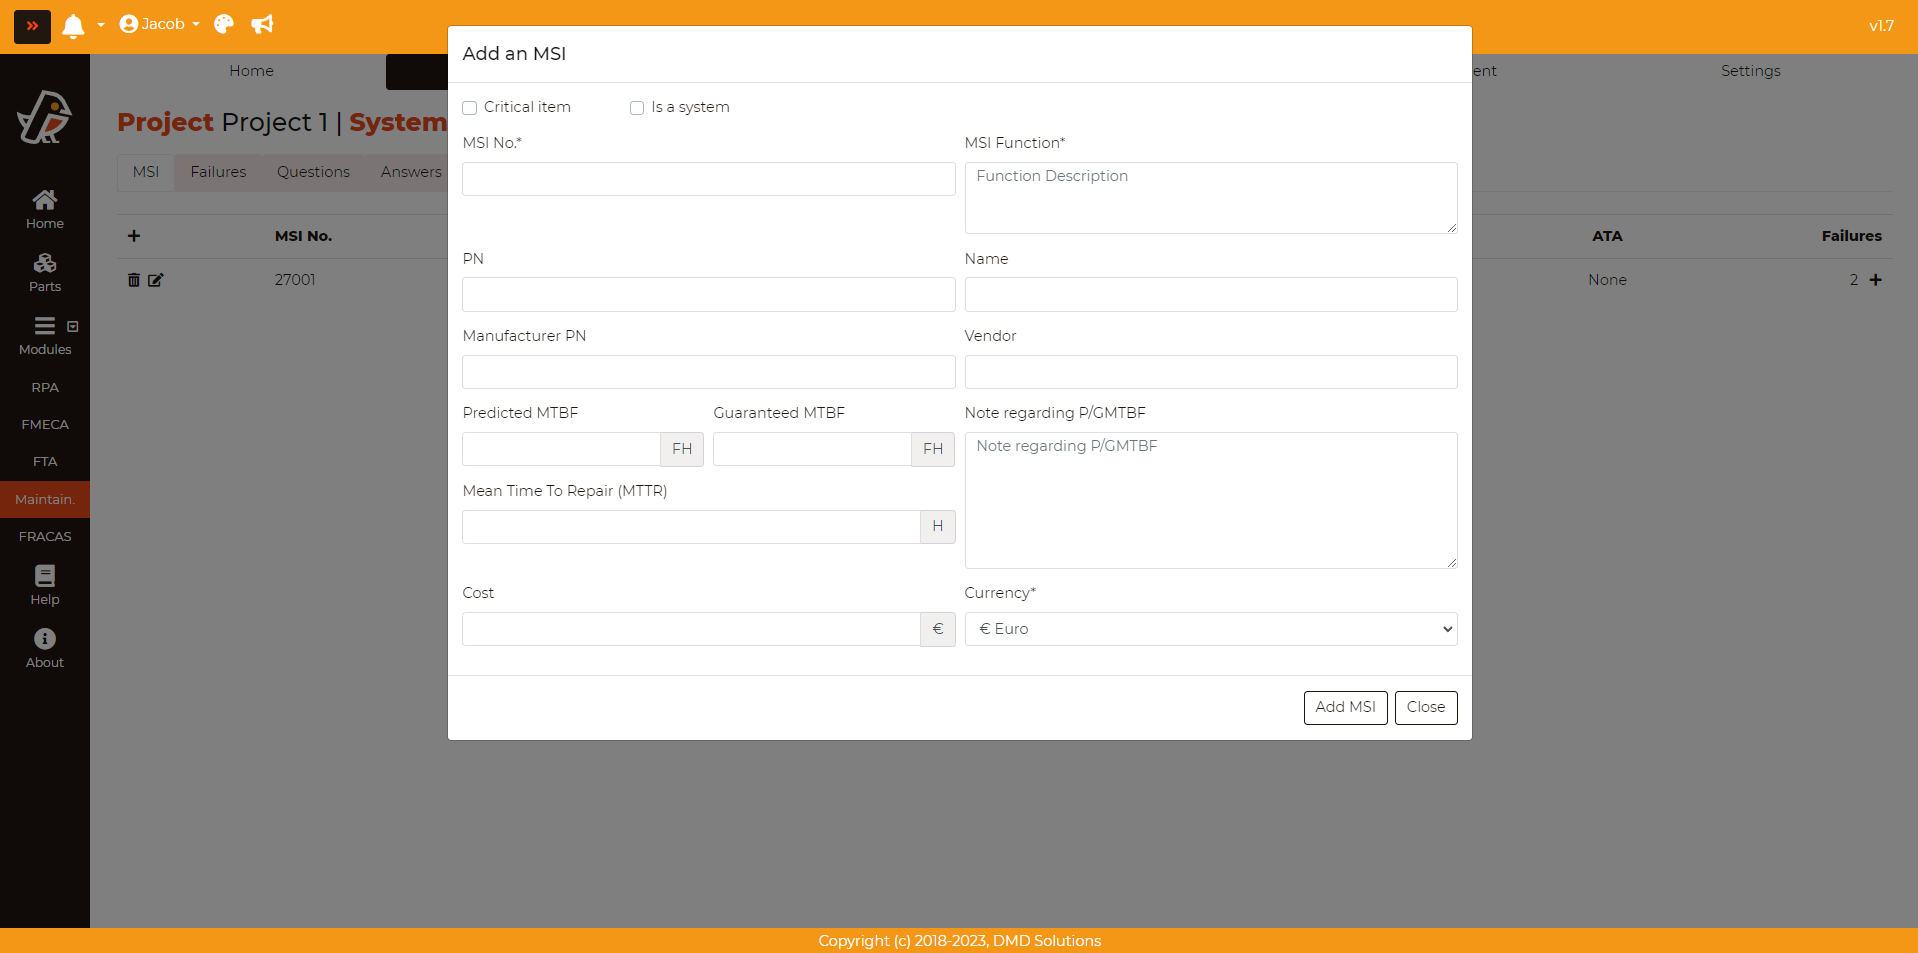
To enter an MSI, the following data is required after pressing Maintainability > MSG-3 MSI Analysis > MSI > Plus (+) button (in the header of the table):
Critical item: It tells if the item is critical
MSI No.: Identification number of the Maintenance Significant Item
MSI Function: Function of the Maintenance Significant Item
PN: The part number is a compulsory field, which uniquely identifies a part created by a given user
Name: Name of the Part
Manufacturer PN: The part number from the supplier, which does not need to be the same as the PN
Vendor: Supplier Name
Predicted MTBF: The Mean Time Between Failure that the supplier predicts
Guaranteed MTBF: The Mean Time Between Failure guaranteed by contract from the supplier
Note regarding P/GMTBF: Any relevant note regarding the MTBF of the part
MTTR: Mean Time To Repair of the part (in hours)
Cost: Price of the part
Currency: Currency of the cost
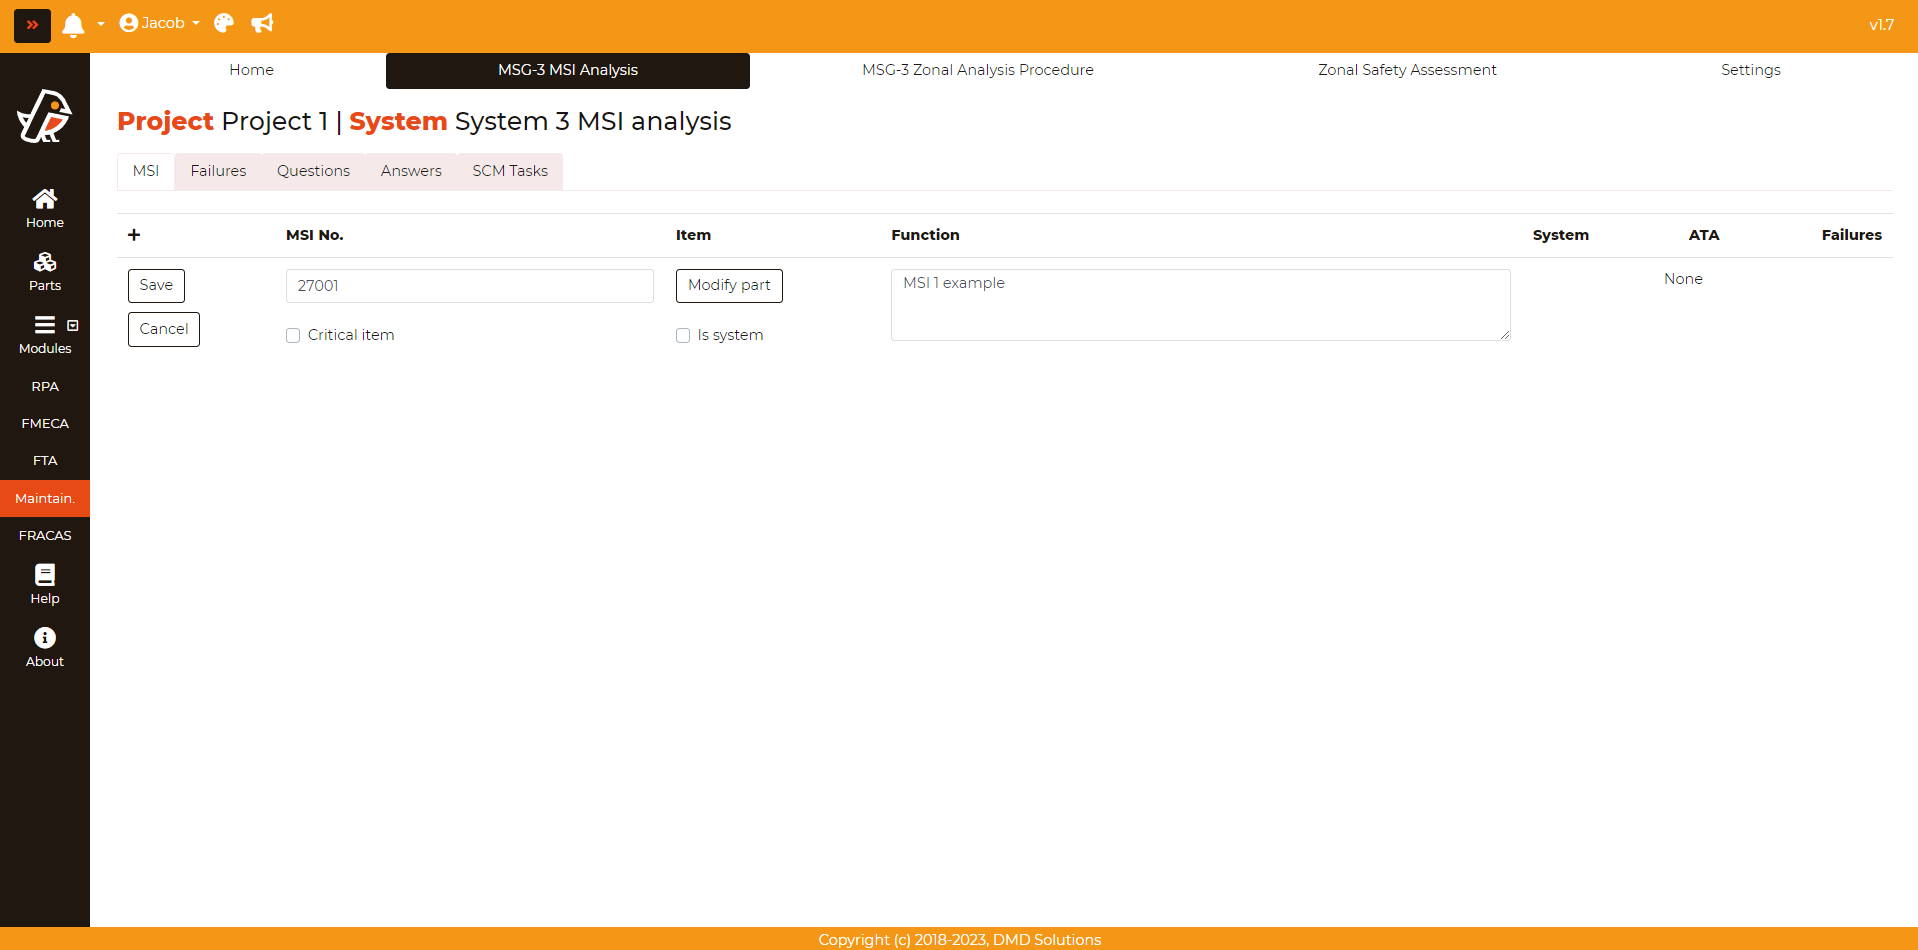
The added MSI can be edited pressing Maintainability > MSG-3 MSI Analysis > MSI > Edit button (First column of the table). Then, fill the opened form and click on the Save button to save the changes. Once added, the MSI will be listed in the table. If an MSI is a critical item, it will be highlighted in red color in the table.
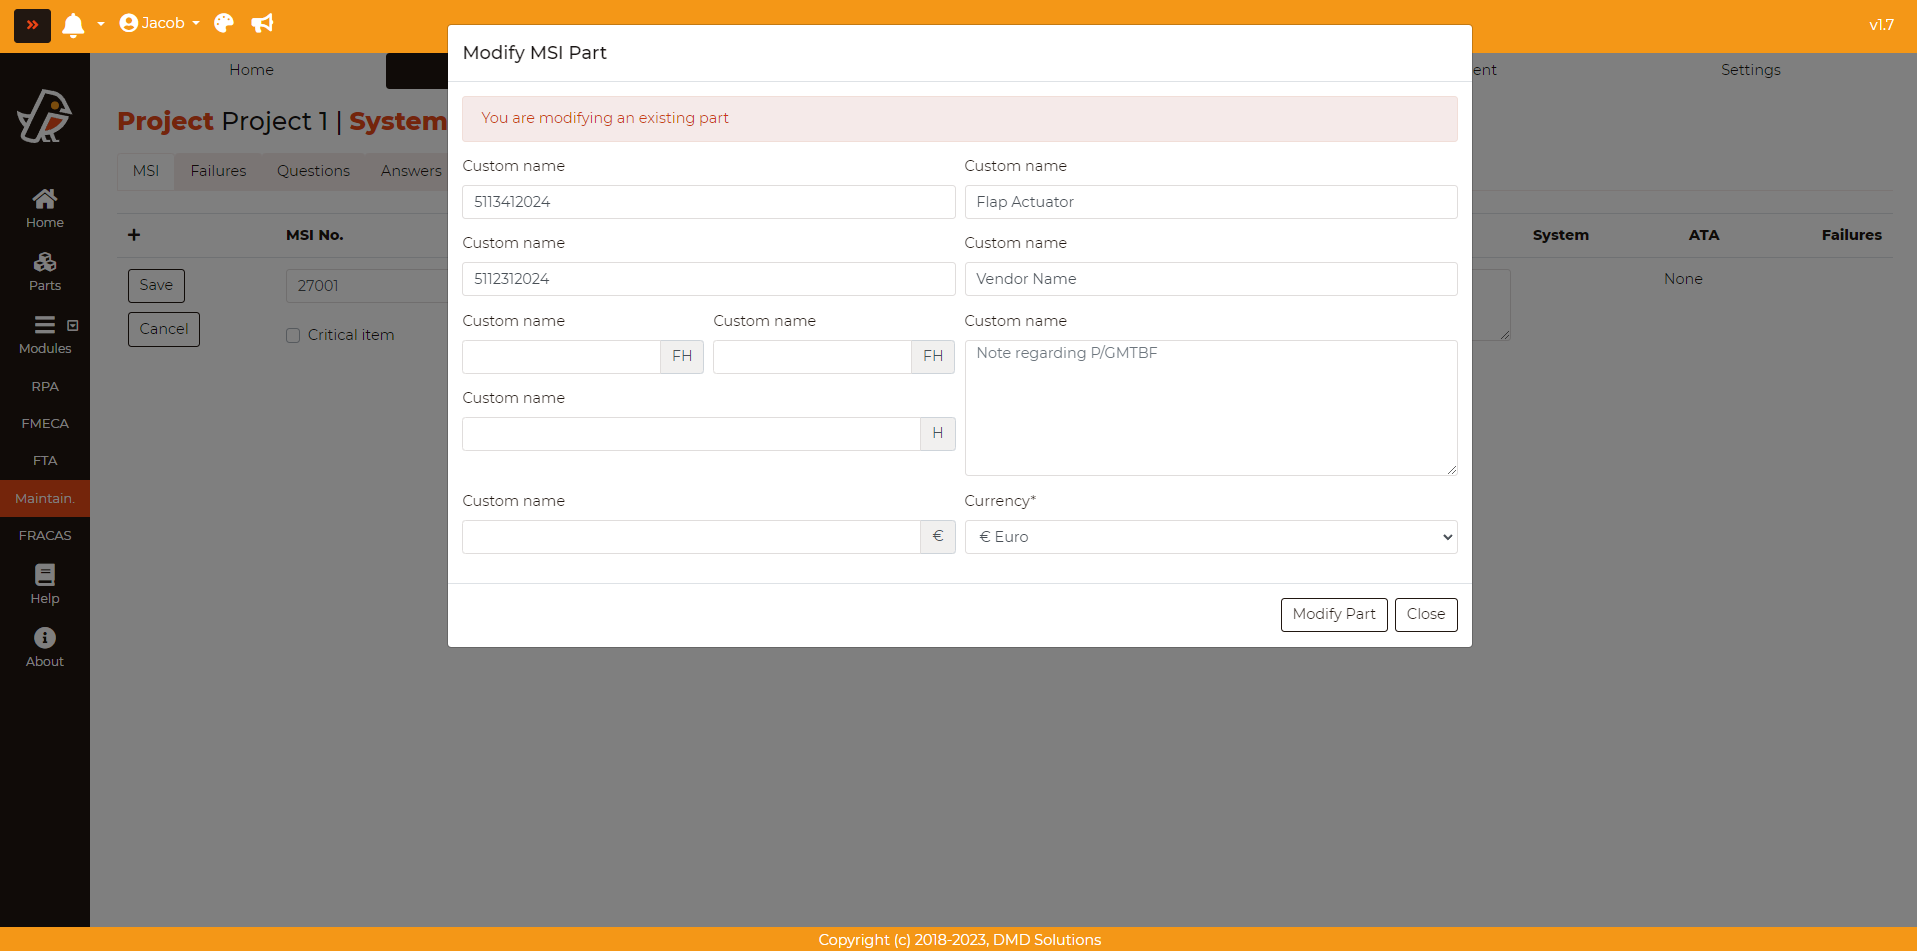
The Part information can also be modified clicking on the Modify part button.
The MSI can be deleted by pressing Maintainability > MSG-3 MSI Analysis > MSI > Delete button (First column of the table)
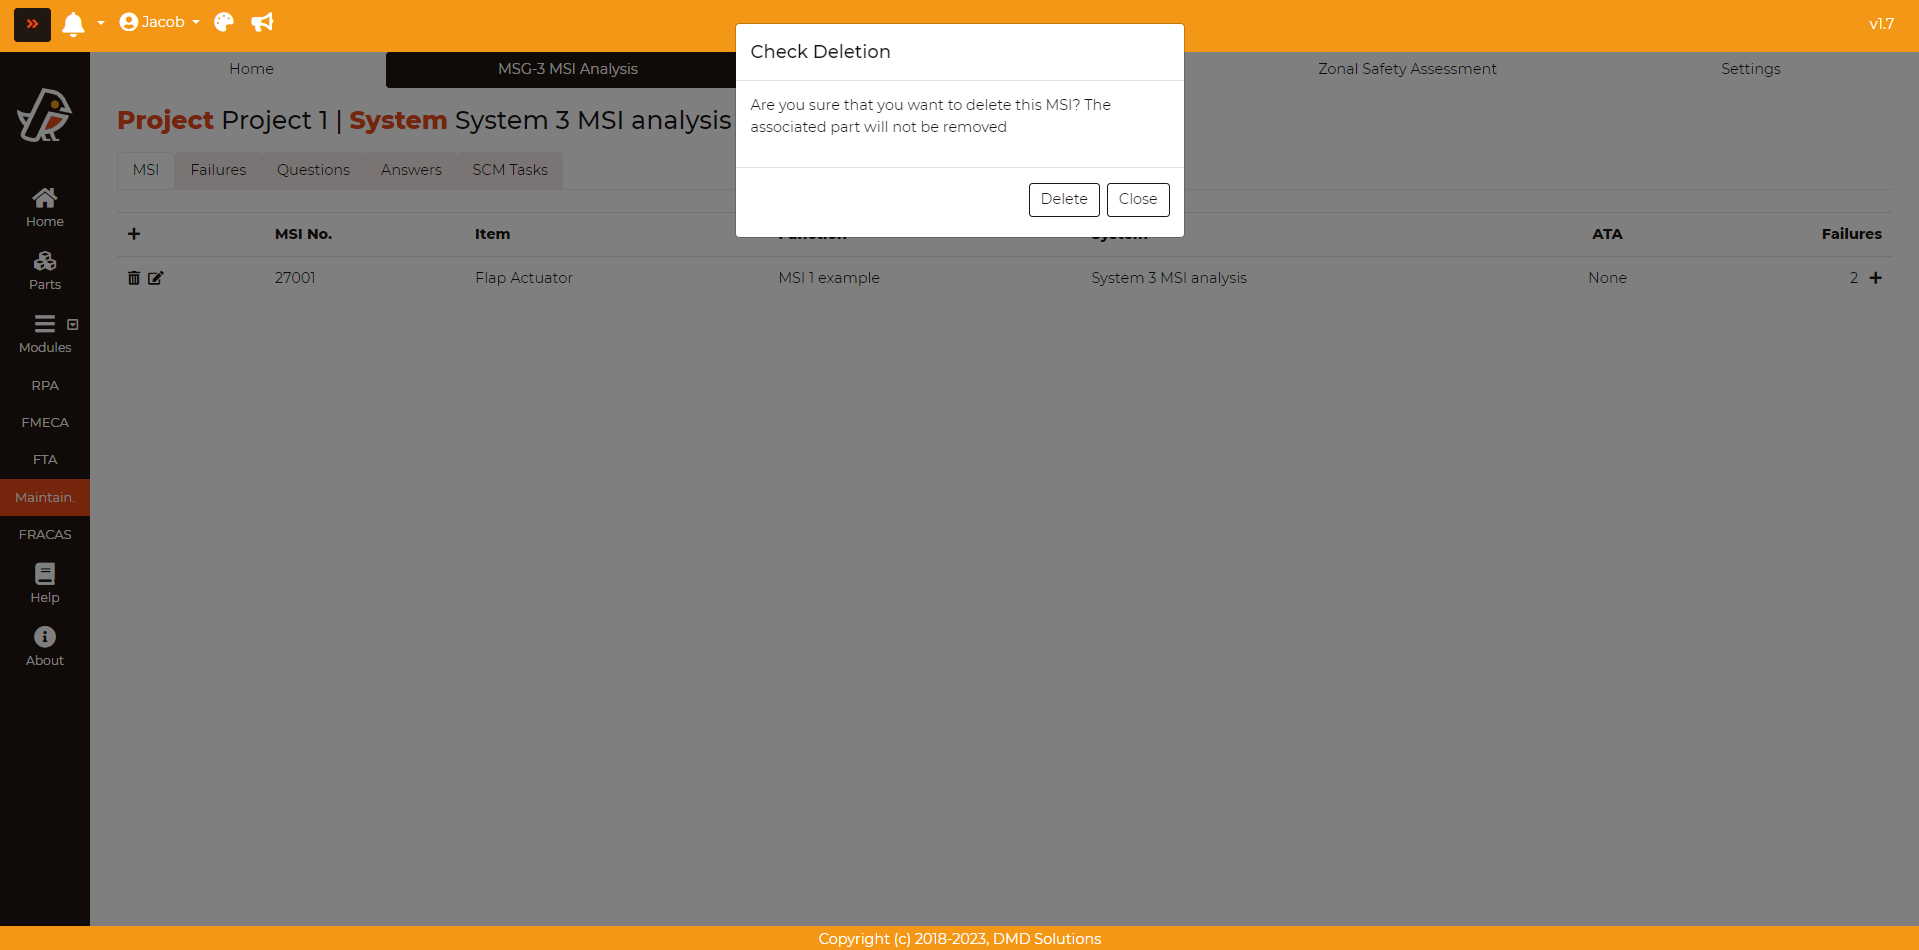
Warning
If an MSI is deleted, its corresponding failures, analysis, and SCM tasks will be deleted as well. Robin will ask for a confirmation before deleting the MSI.
The failures can be added from this page by pressing Maintainability > MSG-3 MSI Analysis > MSI > Add button (Last column of the table). Fill the data of the opened form (check the Failures section) and click on the Add Failure button.
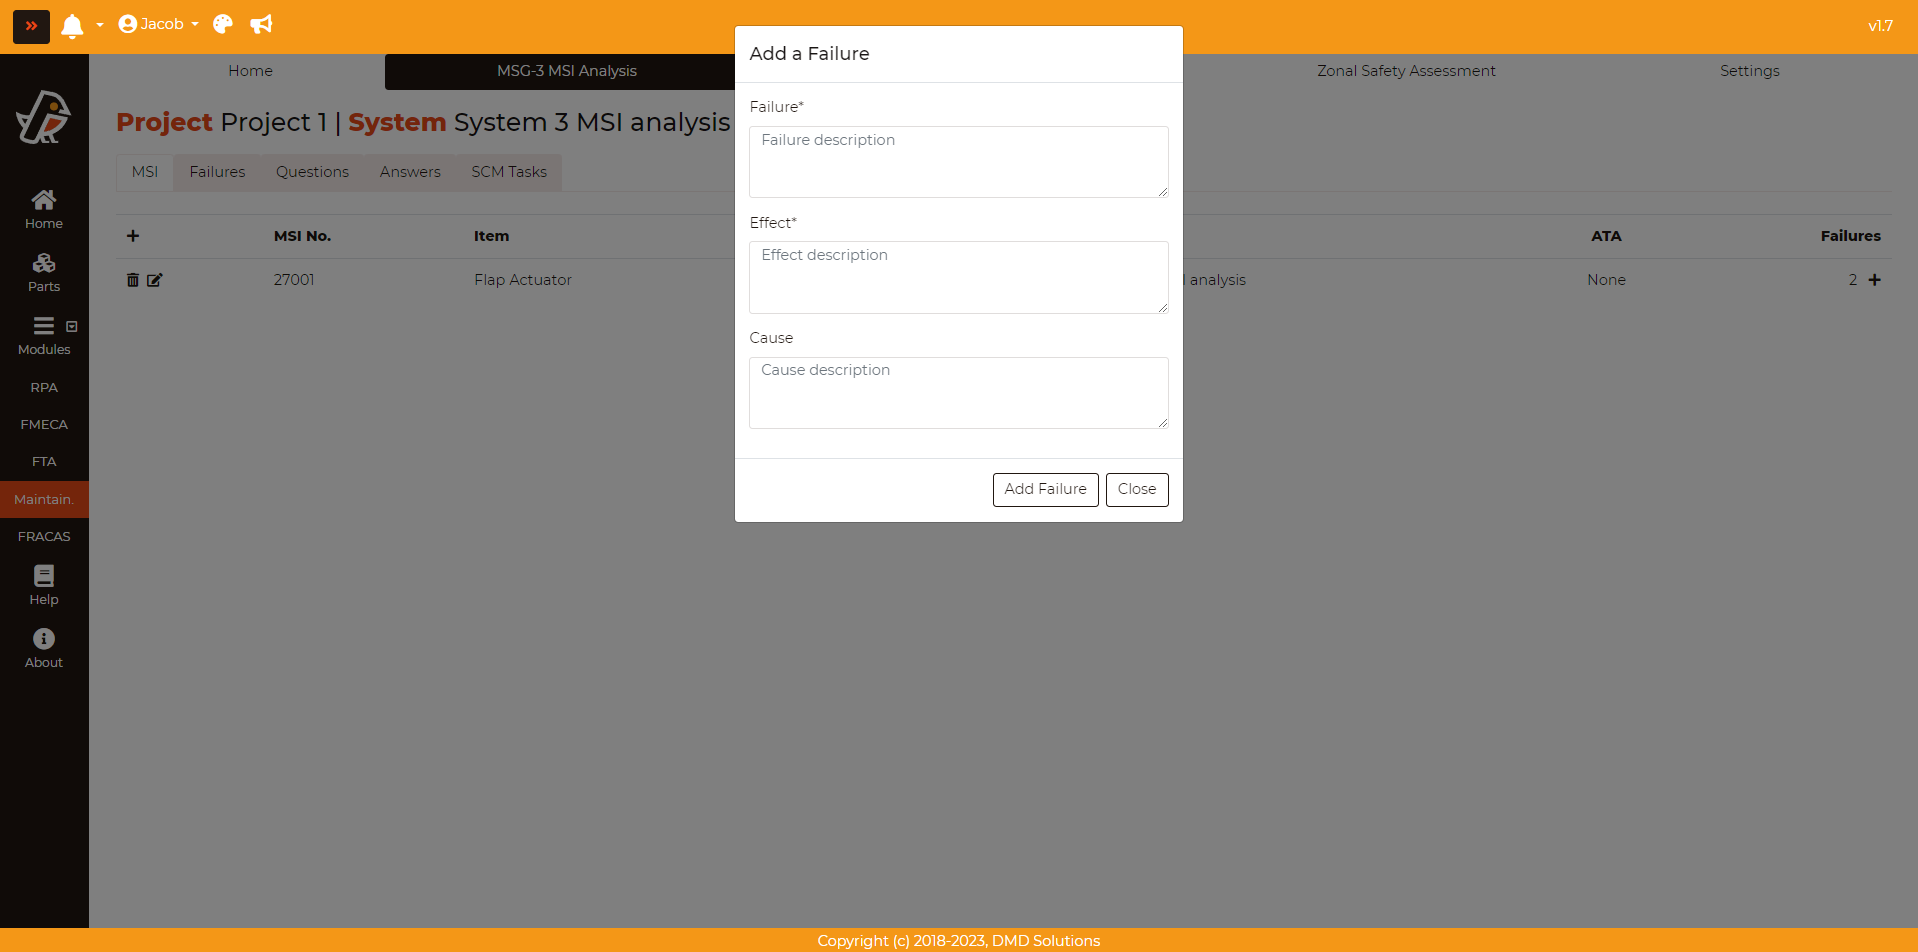
Failures
An MSI can fail in different ways, so all the possible failures must be analysed. To add a failure, go to Maintainability > MSG-3 MSI Analysis > Failures and click on the Add a failure button. The following form will appear:
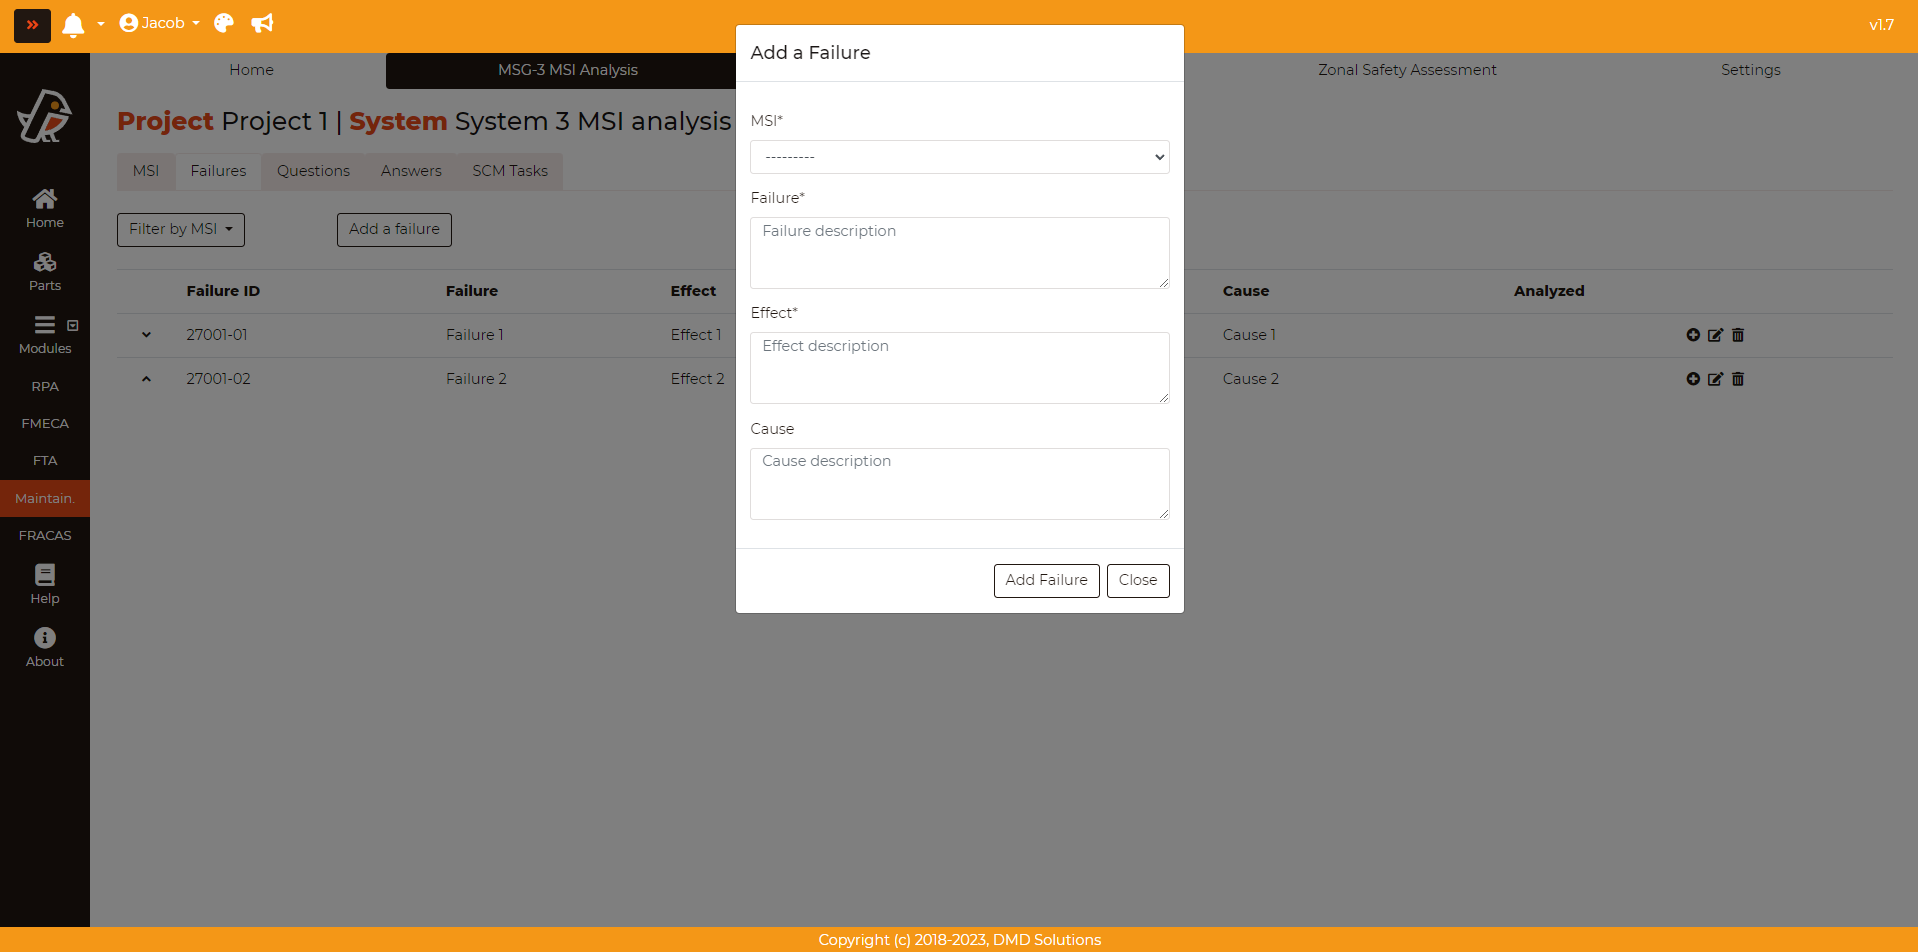
MSI: MSI related to the failure
Failure: Failure description
Effect: Effect description
Cause: Cause description
Once added, the failure will be listed in a table as shown in the image below:
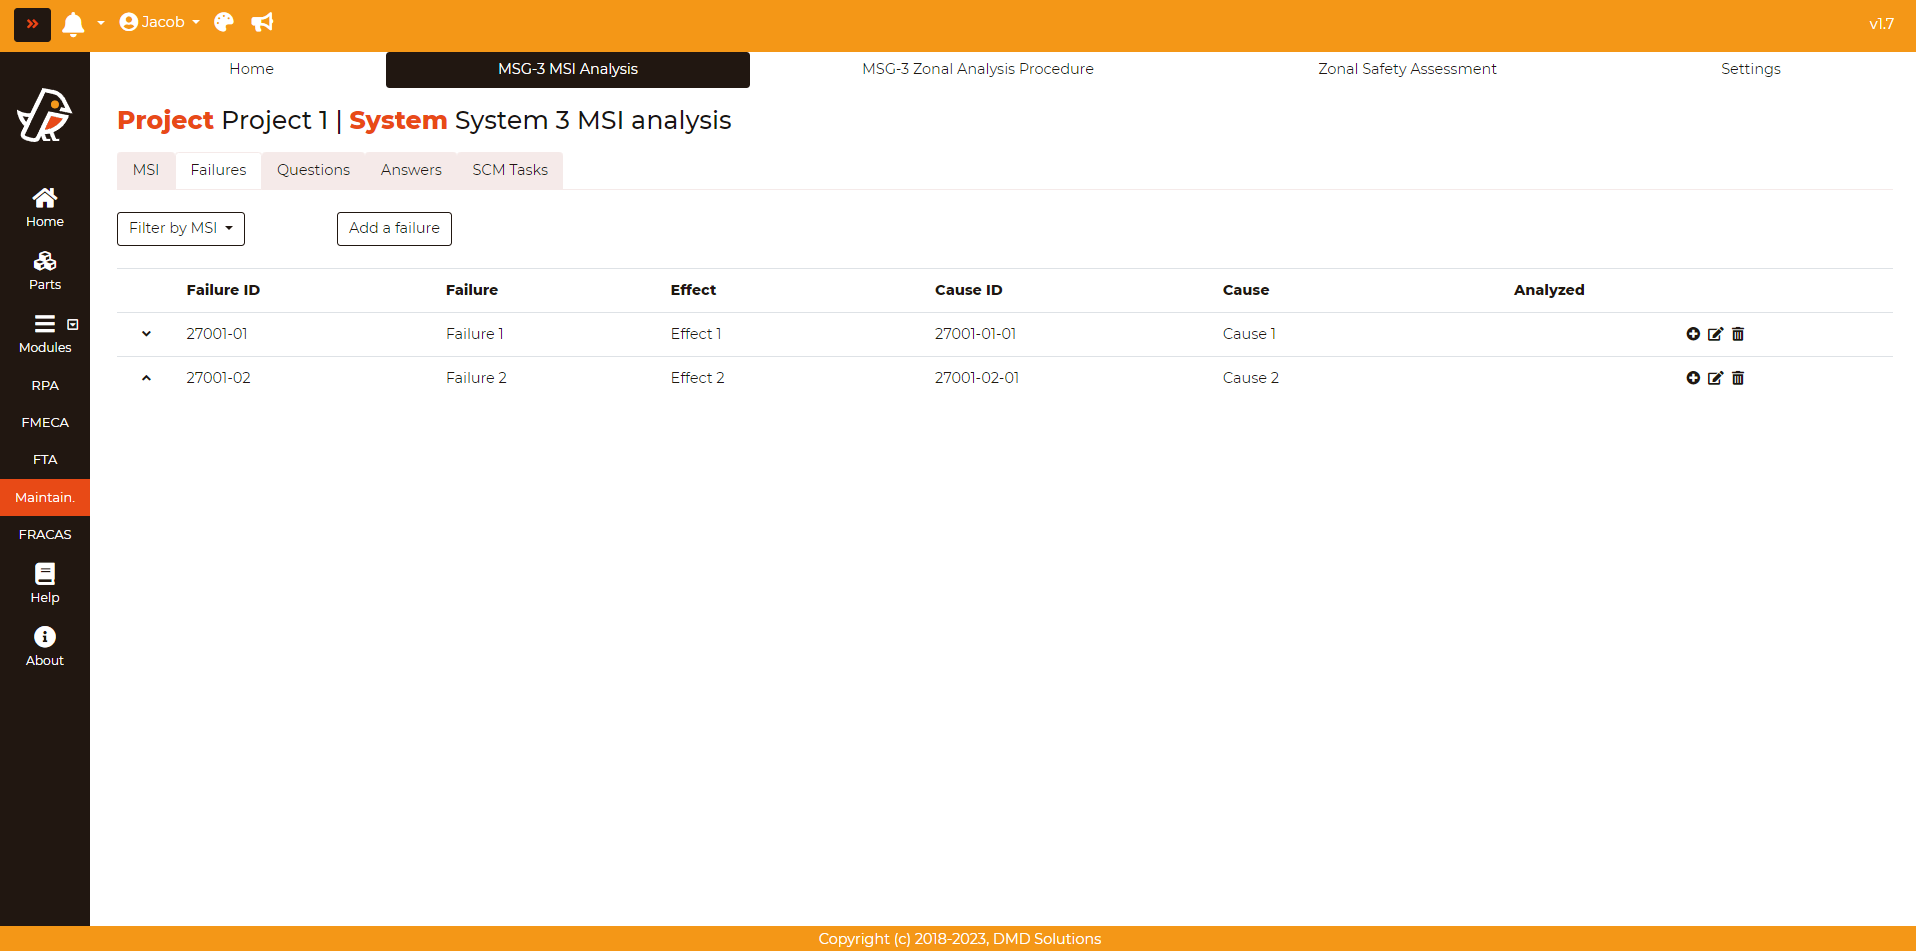
You can easily check if the failure has been already analysed or not and filter by an MSI. You can also edit a failure by clicking on the Edit button in the last column of the table:
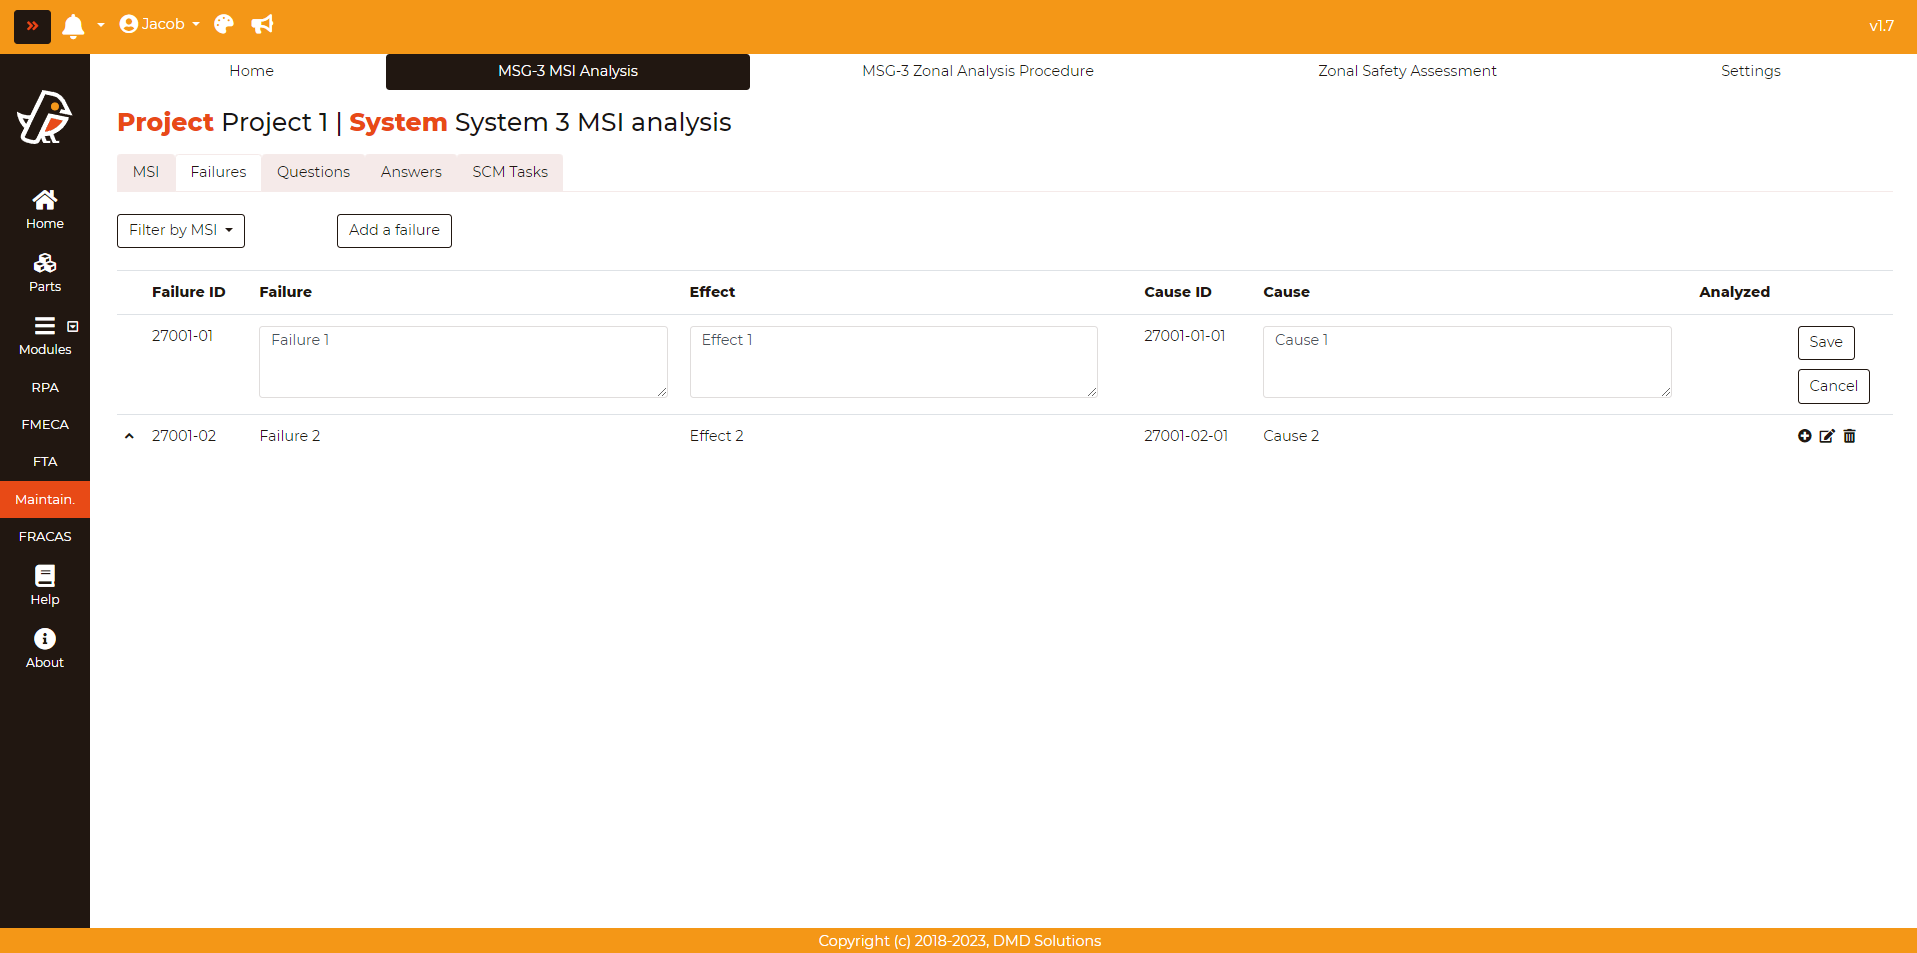
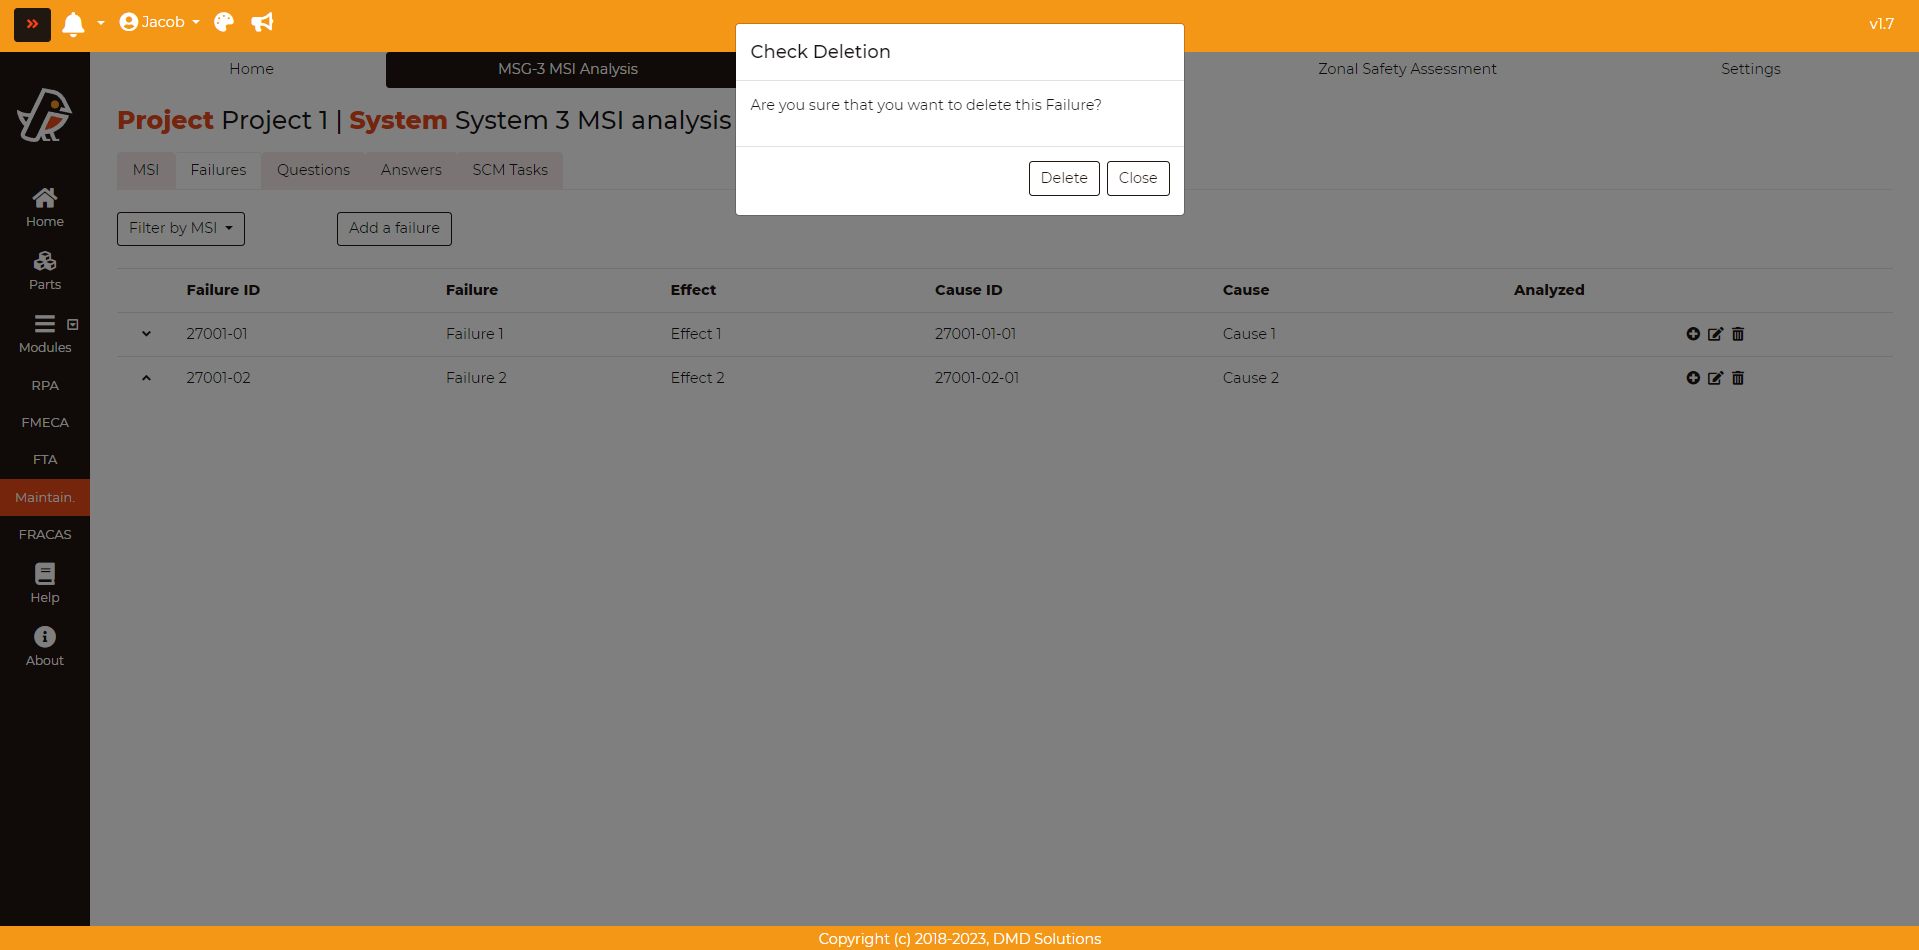
Failures can be deleted by clicking on the Delete button in the last column of the table. Robin will ask for a confirmation before deleting the failure. If a failure is deleted, the analysis and the tasks associated to it will be deleted as well.
Questions
The decision logic diagram provides a logic flow for each failure. The user will start from the top of the diagram answering to the question in the blocks with “YES” or “NO”, which will establish the direction of the logic path. This diagram has two levels of analysis:
Level 1: at this level it necessary to evaluate the Failure Effect Categorization (FEC) for each functional failure.
Level 2: the failure causes for each functional failure are analysed in order to identify the type of tasks.
Failure effect categorization (FEC): in this phase the failure effects are categorized in five categories :
Evident Safety (Category 5)
Evident Operational (Category 6)
Evident Economic (Category 7)
Hidden Safety (Category 8)
Hidden Economic (Category 9)
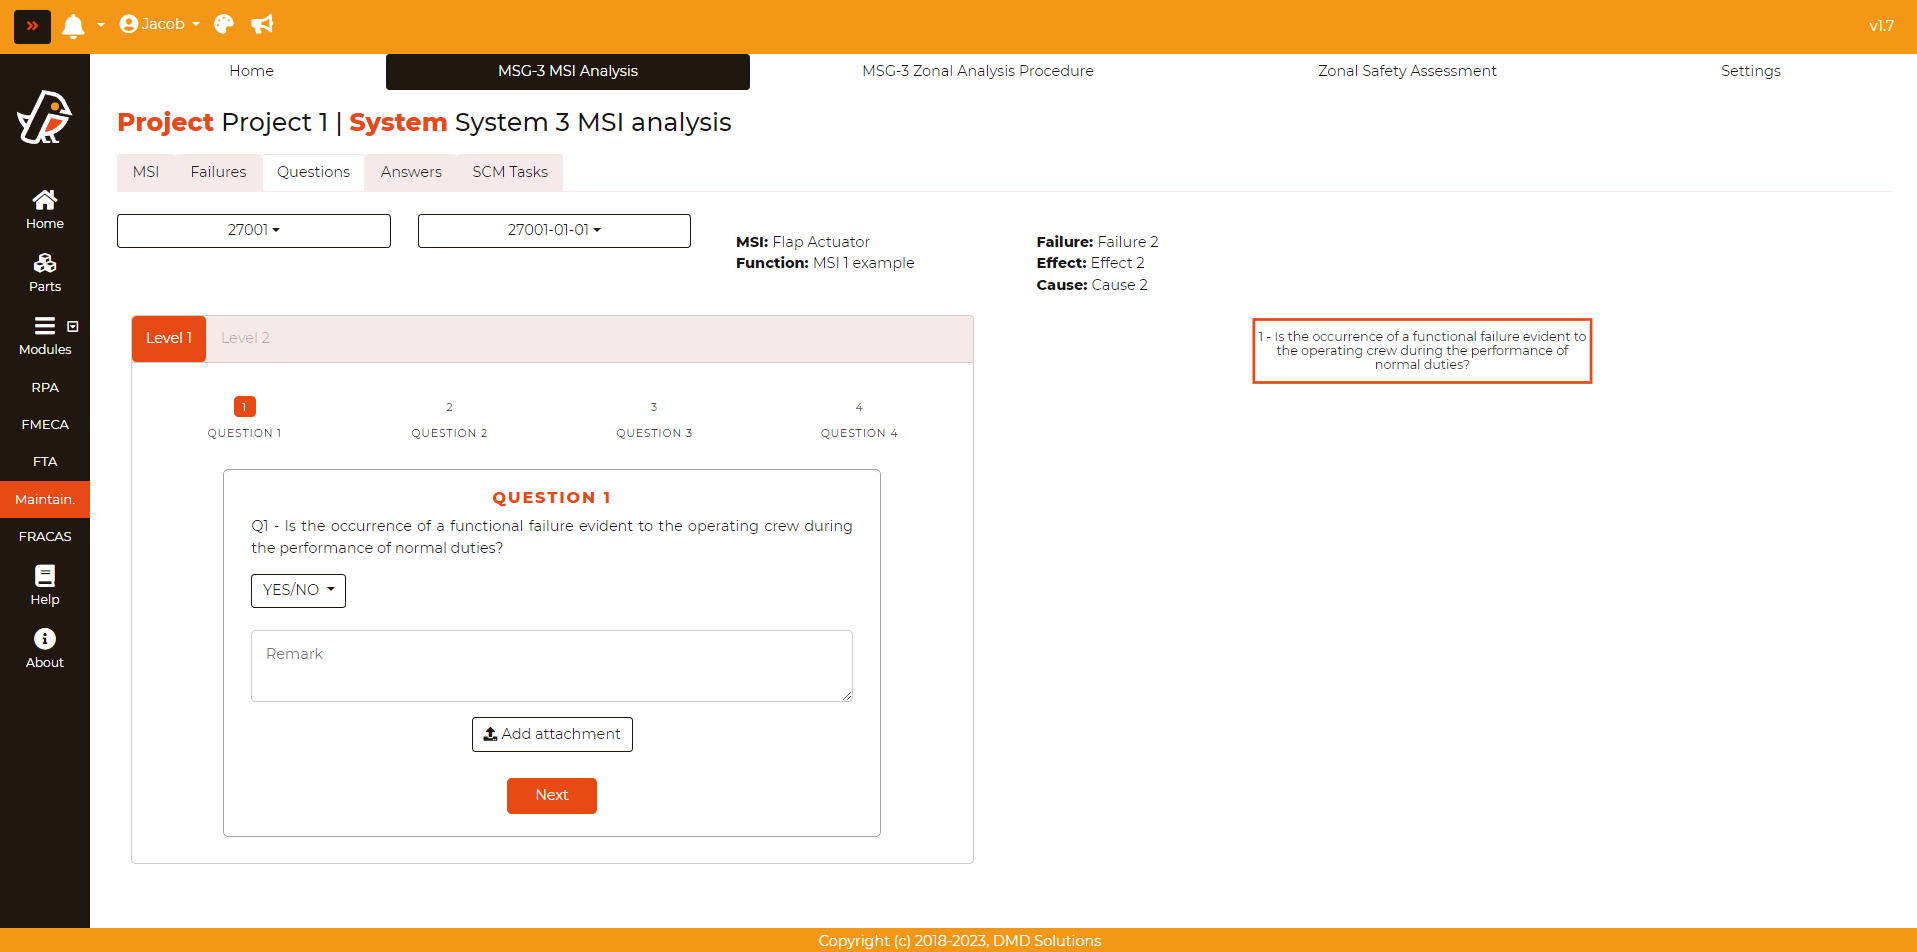
To do the questionnaire, go to Maintainability > MSG-3 MSI Analysis > Questions and select a failure. If the failure has never been analysed, the following form will be displayed:
Otherwise, it will show the logic diagram of the previous analysis:
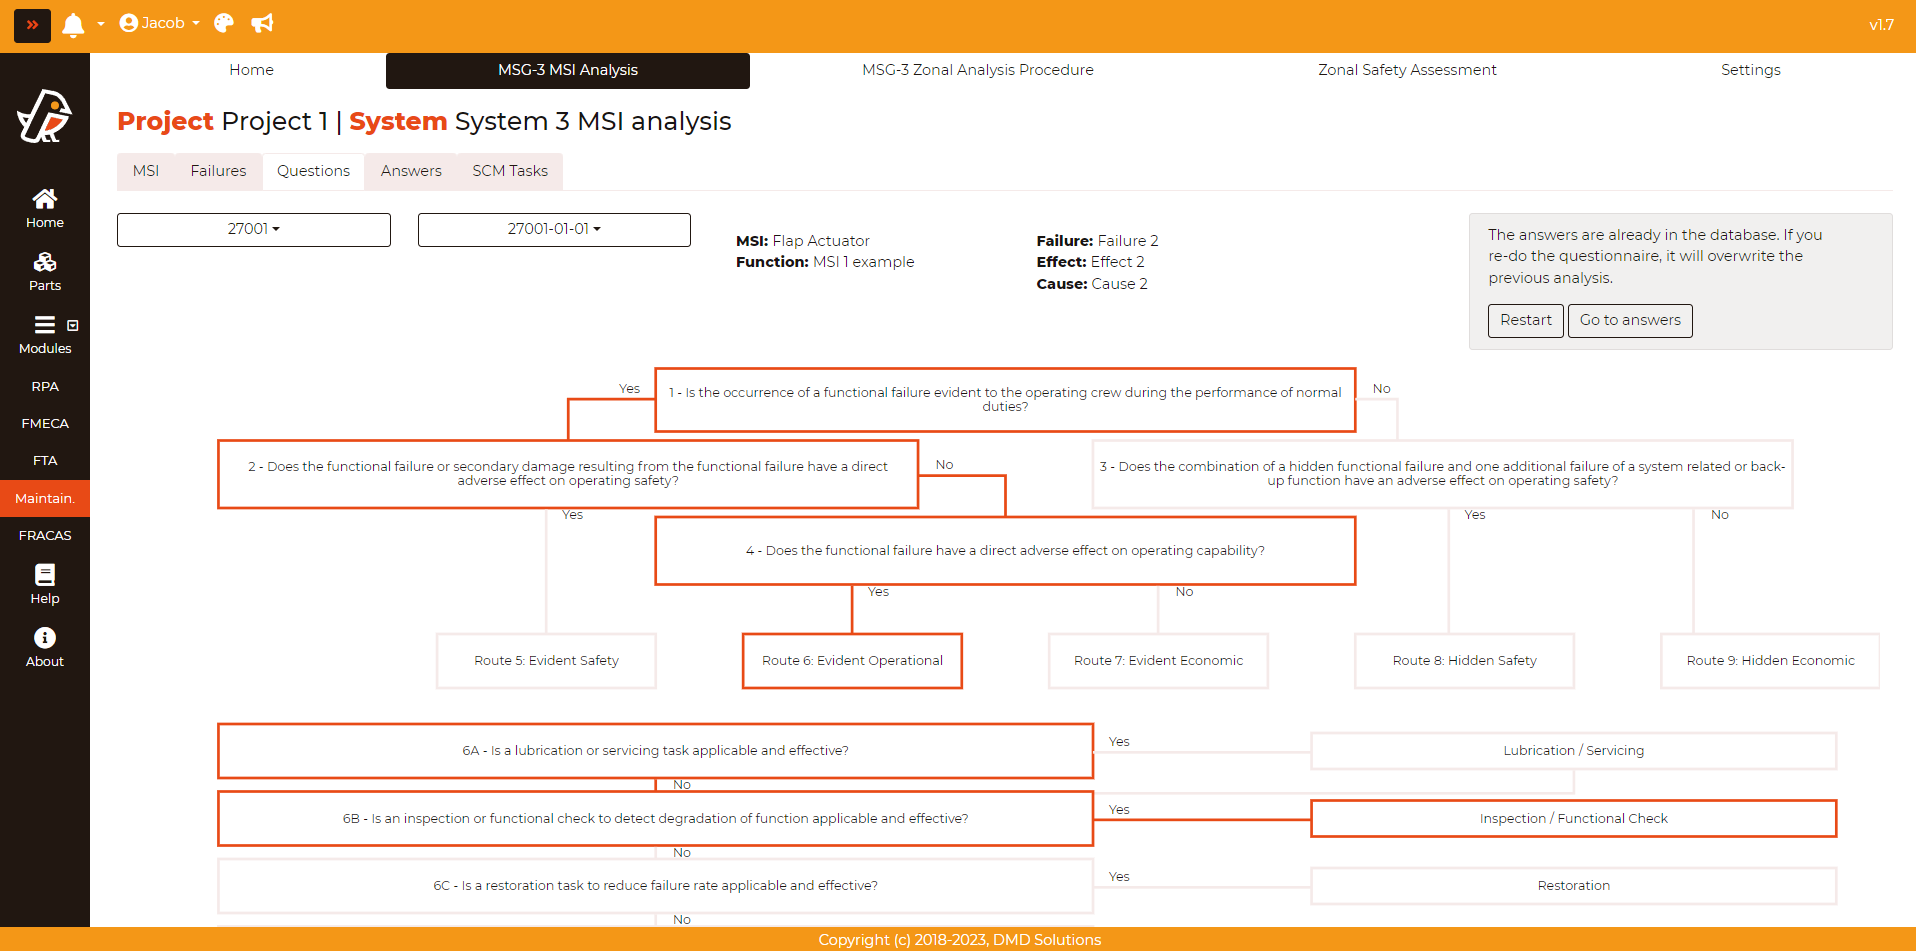
If the user wants to repeat the analysis, click on the Restart button.
In case the user want to keep with the analaysis, the user can click on the Go to answers button.
Warning
If the user repeats an analysis, the previous analysis and its associated tasks based will be deleted.
In the opened form, the answers, remarks, and attachments have to be filled. Robin will guide the user to the next questions according to the user’s answers. For each answer, the user can provide a remark and upload an attachment. After the last question from Level 1, the Failure Effect Categorization (FEC) will be shown.
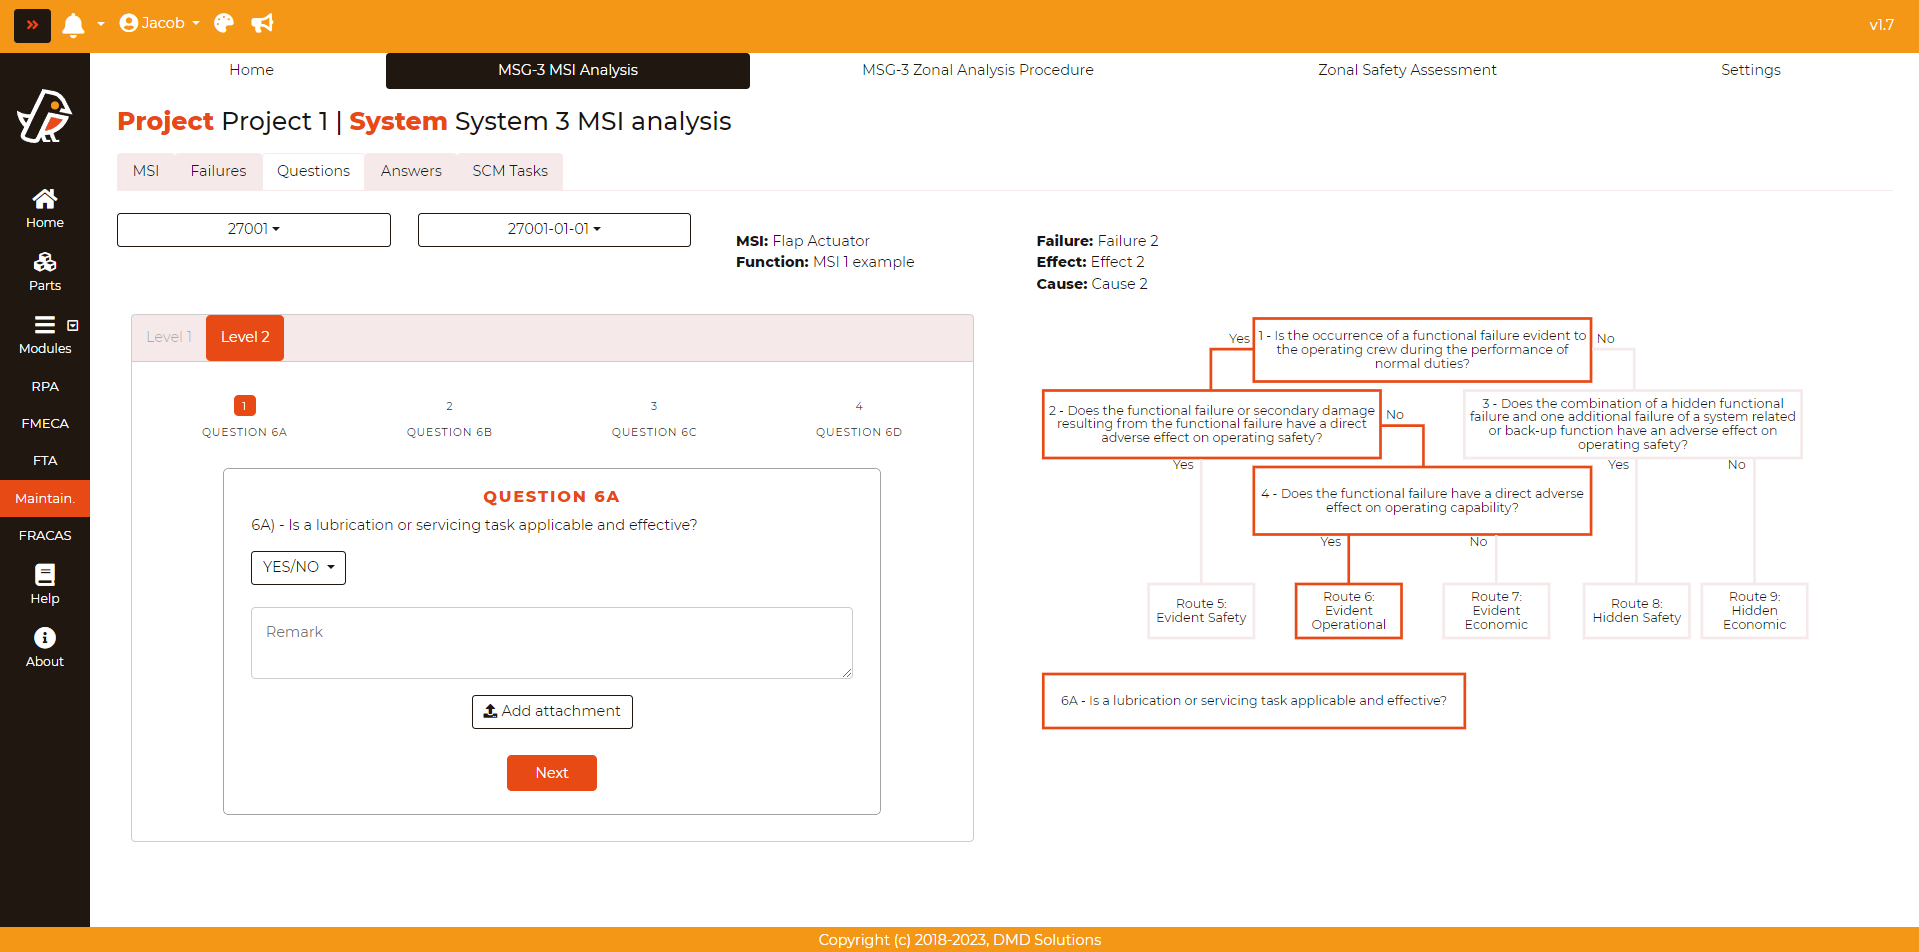
Then, the Level 2 will be shown:
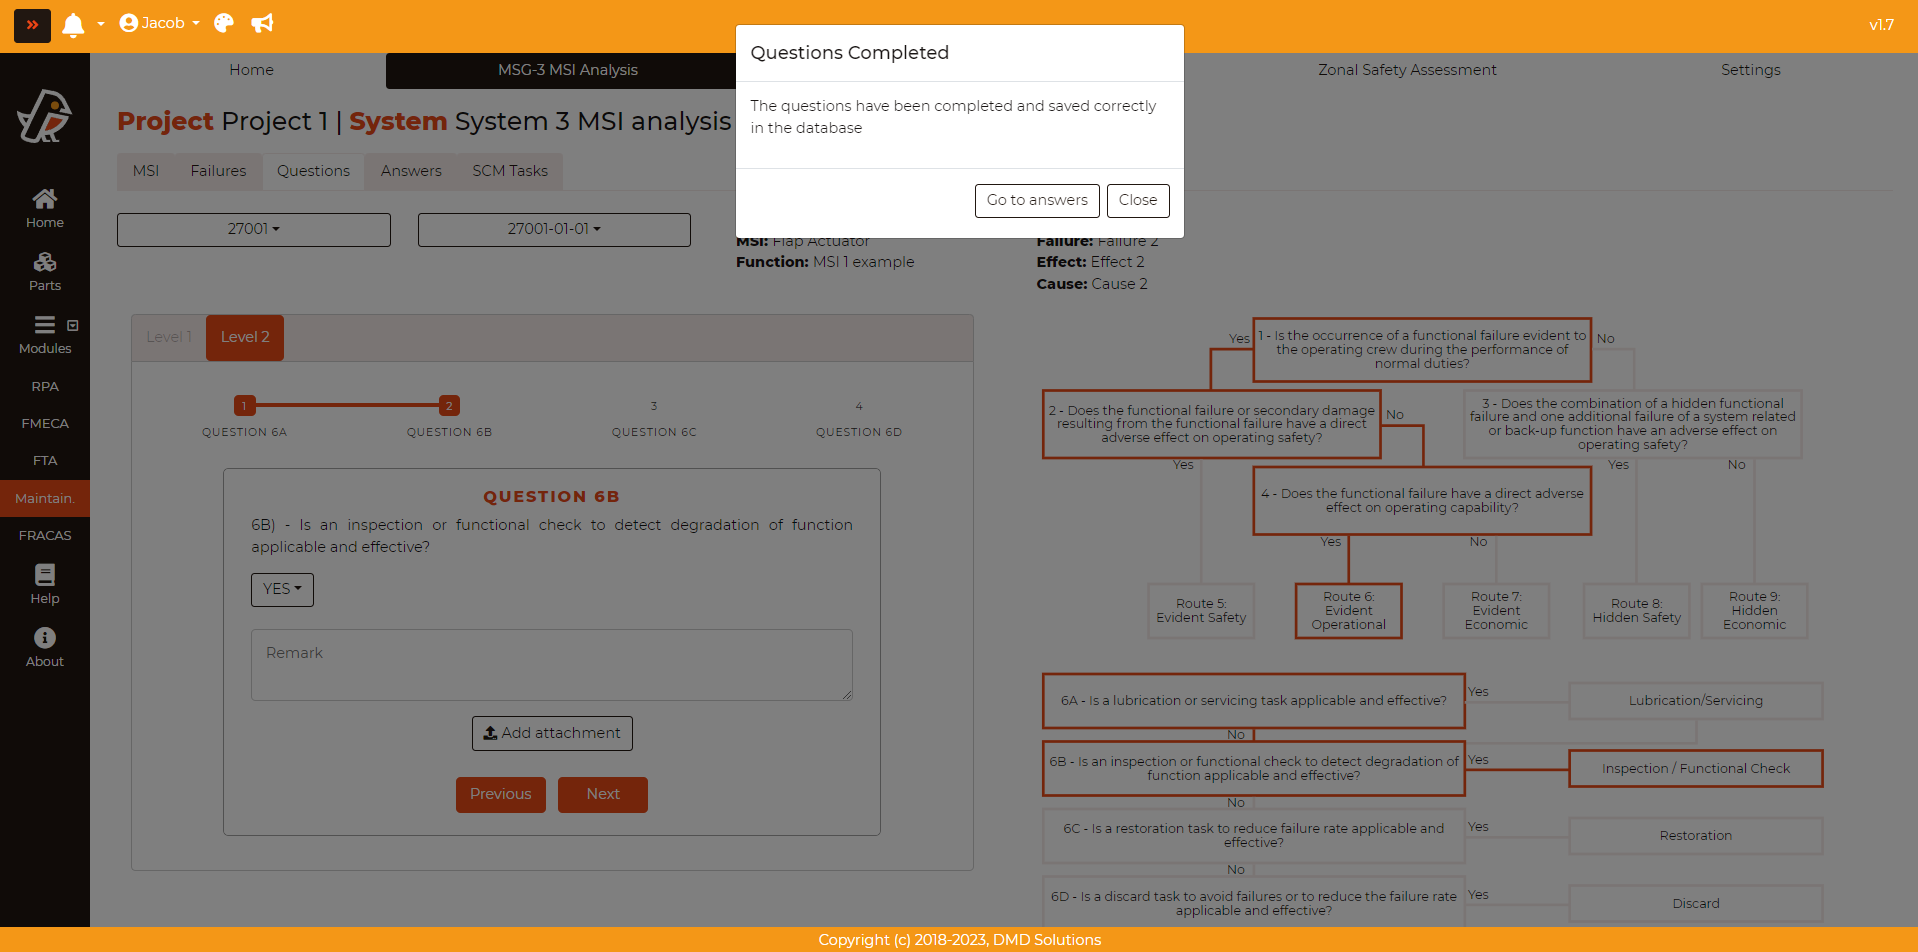
Once the questions from Level 2 are also completed, the user can either Go to answers or Close and select the corresponding MSI, failure and cause to observe it.
Answers
Maintenance task selection: In this step considering the FEC the analyst has to define for each failure cause the suitable maintenance action.
Lubrication/Servicing Task of an item to maintain satisfactory operation
Operational/Visual Check - failure finding task of an item for hidden safety and hidden non-safety consequences only
Inspection/Functional Check - inspection of an item to find any potential failures (detect degradation or actual failure). The inspection includes three categories: General Visual Inspection (GVI), Detail Inspection (DI) and Special Detail Inspection (SDI). The functional check compares measured values against an established standard
Restoration of an item at or before some specified age limit (may vary from cleaning or replacement of single parts up to a complete overhaul)
Discard of an item at some specified life limit
Once a failure has been analysed, it is possible to create the tasks if they are needed. Go to Maintainability > MSG-3 MSI Analysis > Answers and select a failure. All the answers related to that failure will be shown. The user can also access (and download) the attachments directly, edit answer and remark fields, and check the number of SCM tasks associated the each answer:
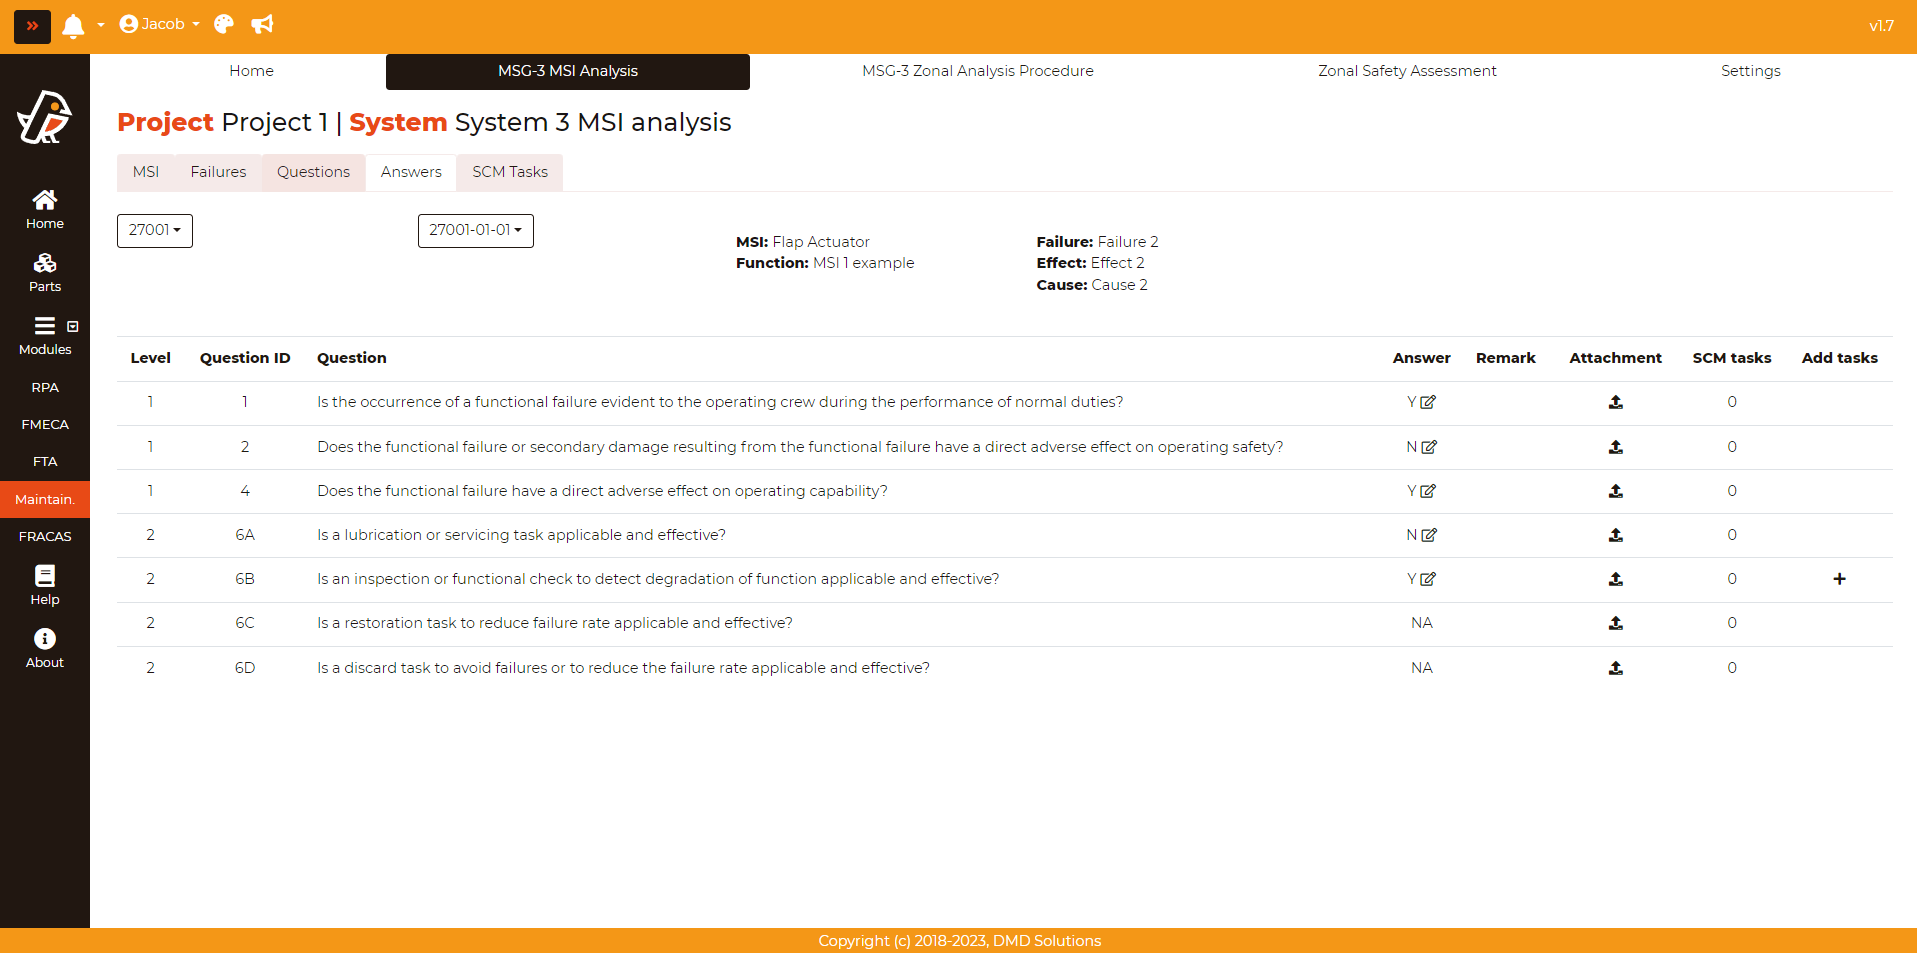
Tasks should only be created for “Yes” answers of Level 2. To create a task, click on plus button (+) and fill the form:
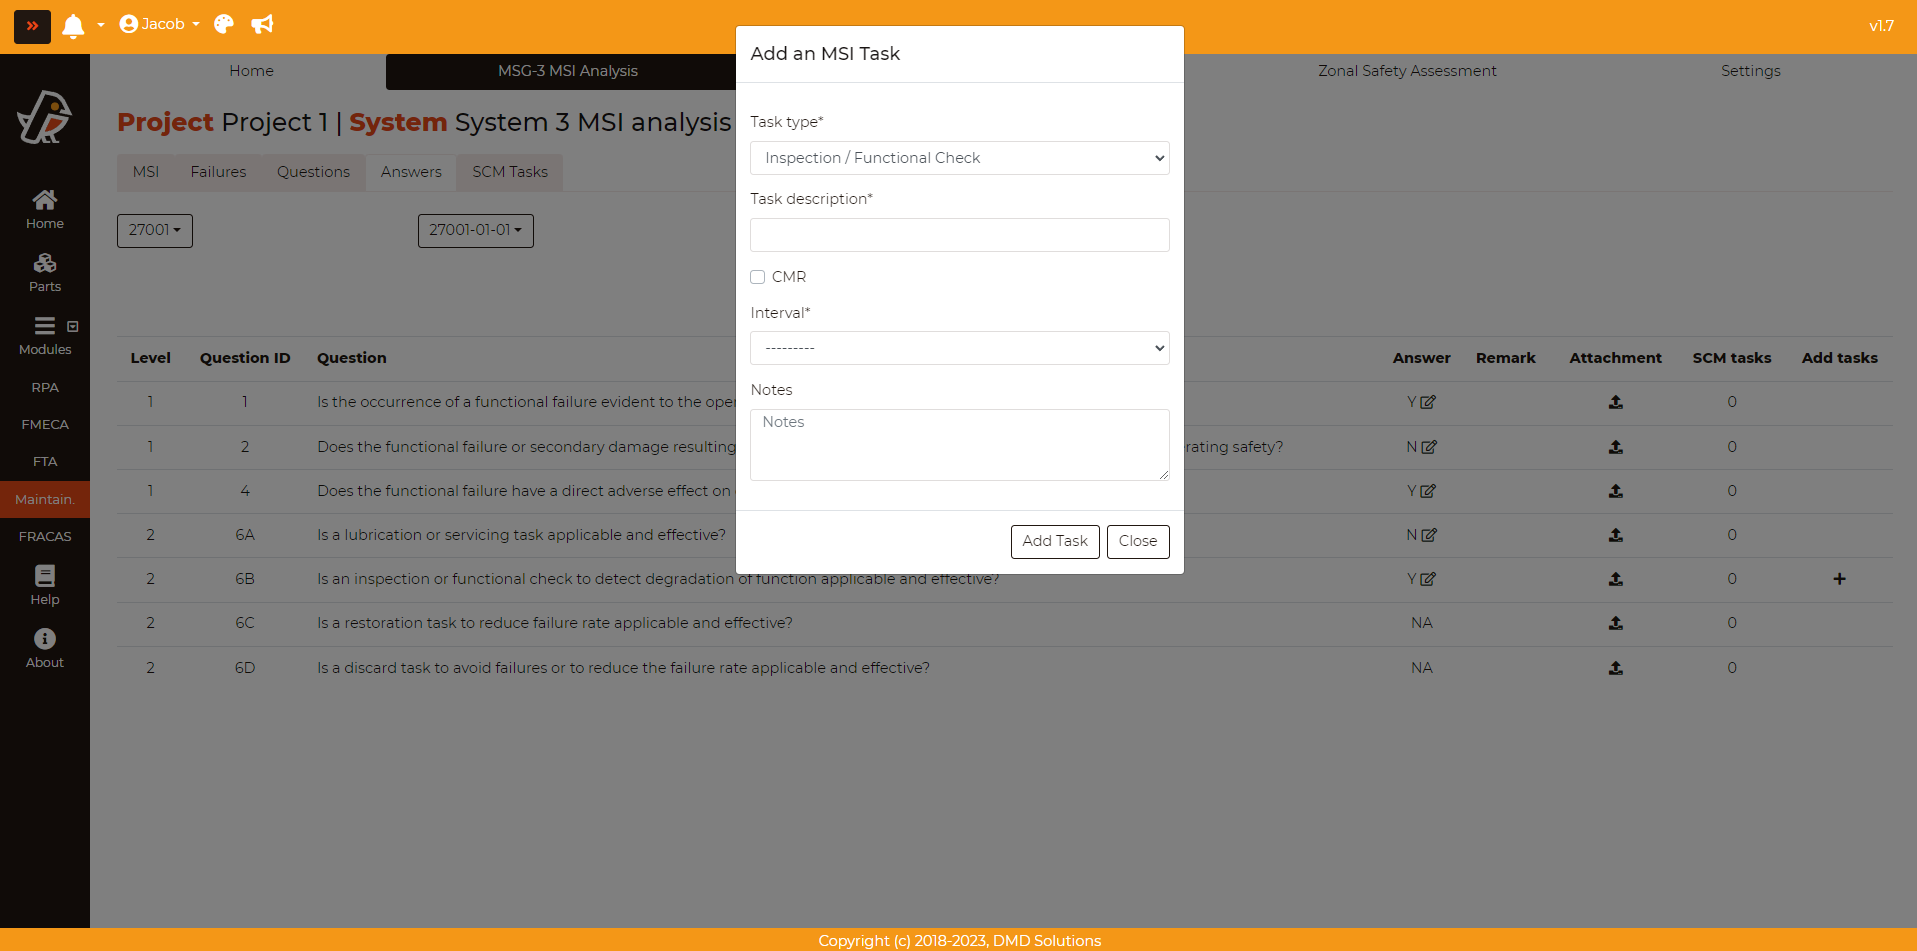
Task type: As listed before, there are five type of tasks: Lubrication/Servicing, Operational/Visual Check, Inspection/Functional Check, Restoration and Discard
Task description: Description of the task
Interval: Interval after which the task must be performed (The intervals are customised for each user: they can be set in MSG-3 Maintainability settings)
CMR: It tells if the task is a Certification Maintainance Requirement
Notes: Notes that the user can add about the task
SCM Tasks
Once the analysis has been performed and all the required tasks has been created, the user can get the list of tasks pressing Maintainability > MSG-3 MSI Analysis > SCM Tasks:
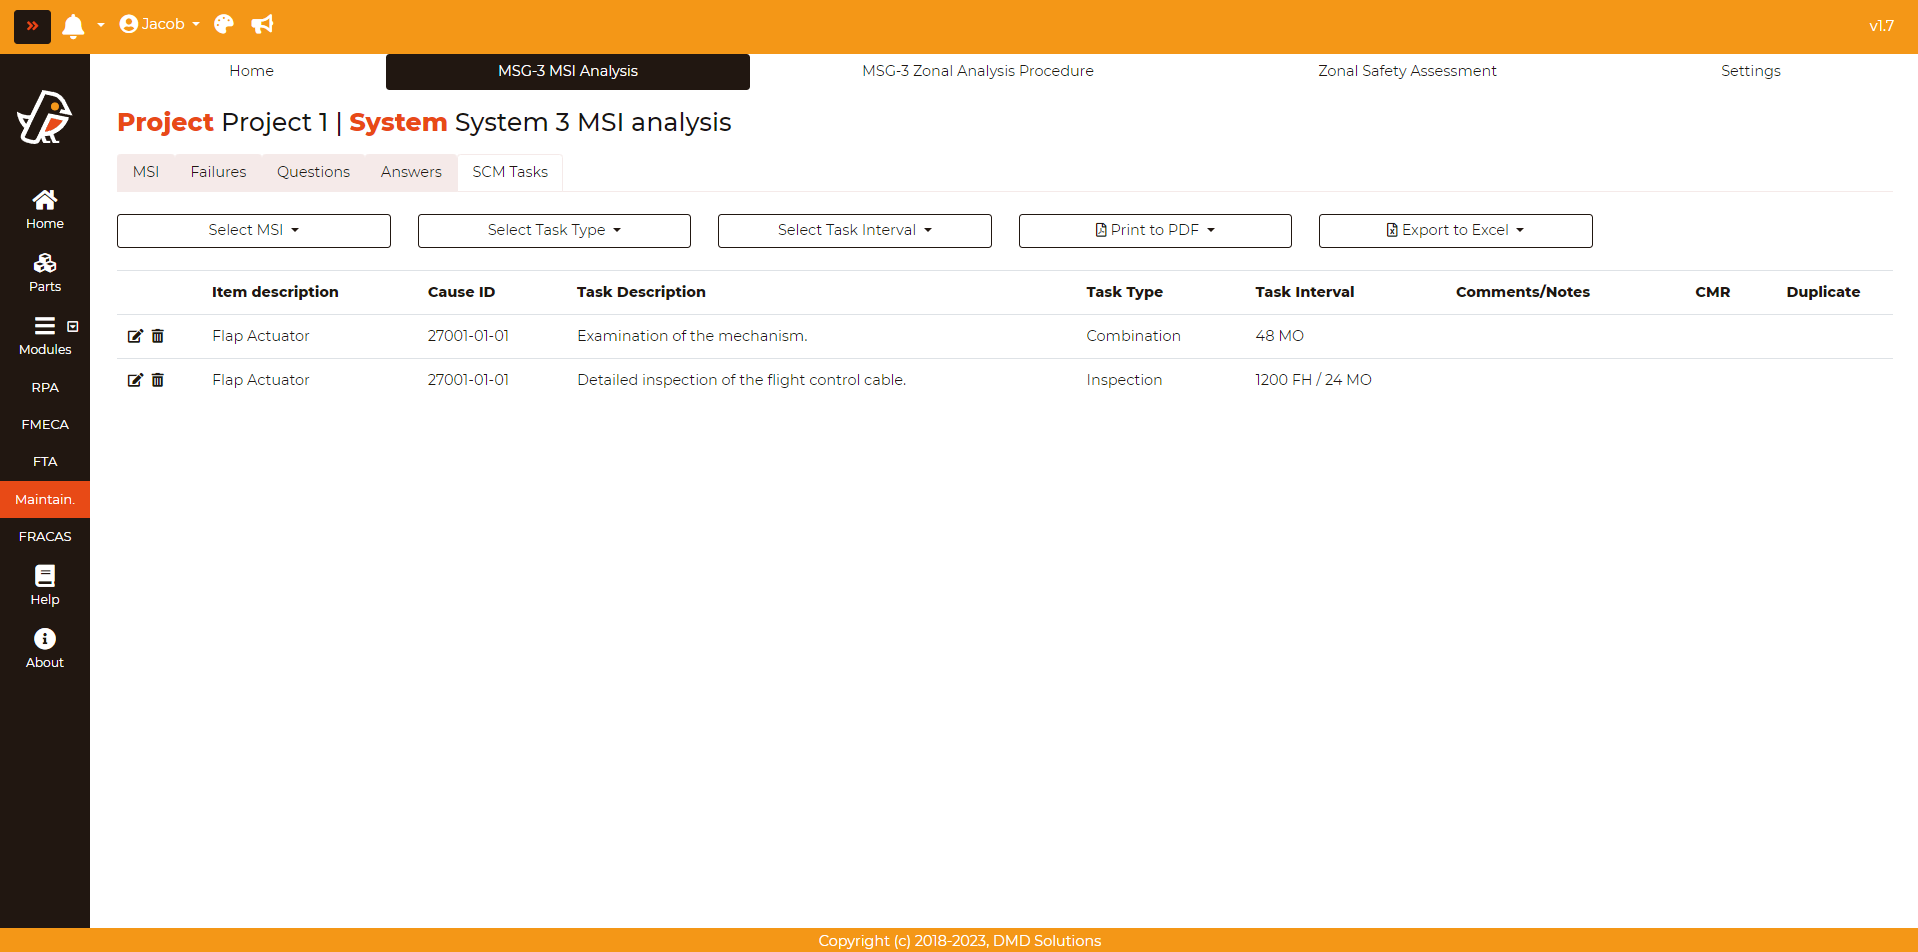
The user can filter by MSI, task type or task interval. In addition, the CMR (Certification Maintainance Requirements) will appear highlighted in green color.
Report & Export
The user can download the report of the system analysis. Go to Maintainability > MSG-3 MSI Analysis > SCM Tasks and click on Print to PDF button, then select the page size. The report will be downloaded directly.

This report contains all those failures that has been analysed. For each failure, it shows the information about the failure and its analysis (Logic diagram, answers, remarks and attachment). It also contains all the tasks related to each of the failures.
Additionally, the user has the option to export tasks by simply clicking on Export to Excel button. This button provides a dropdown menu for exporting tasks in either .xlsx or .csv format, offering various separator options.
