Parts Management
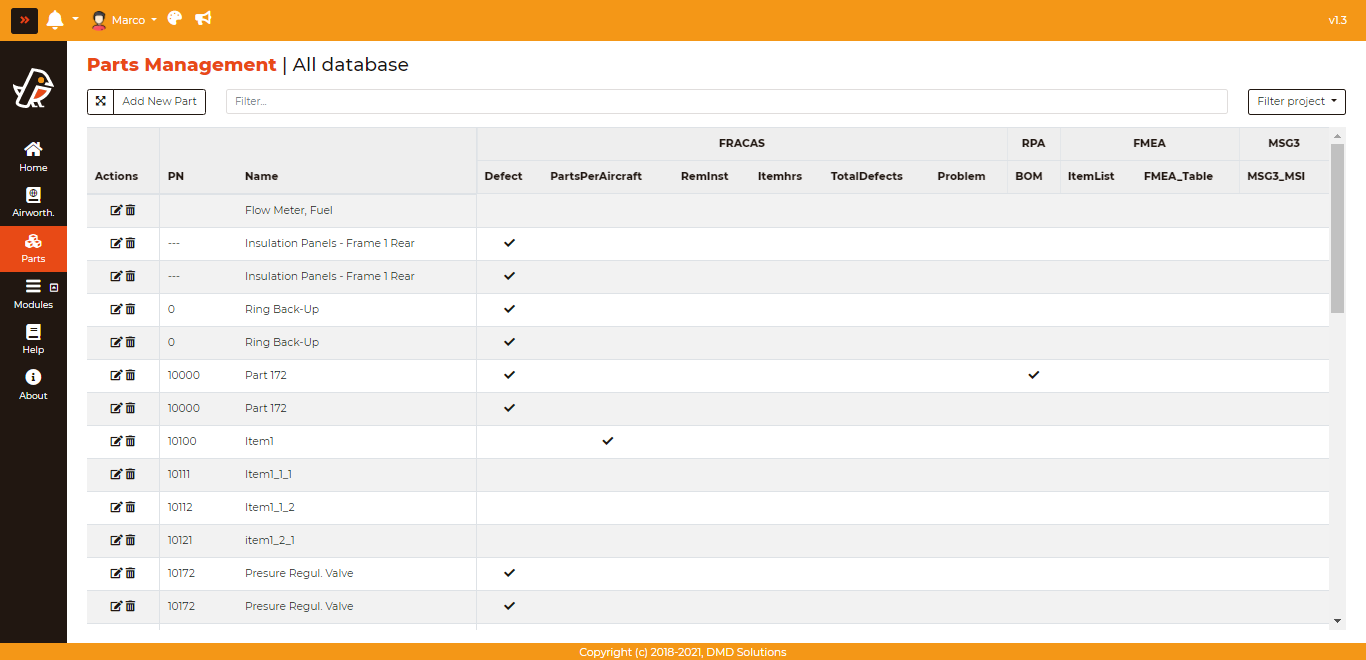
The Parts Management tab is a place where you can view the parts used in every single module, showing the part’s PN, Name, and where (table) in each module the part is being used (expressed with check marks).
Note
When hovering over a check mark, a tooltip shows you what project a part belongs to.
Functions
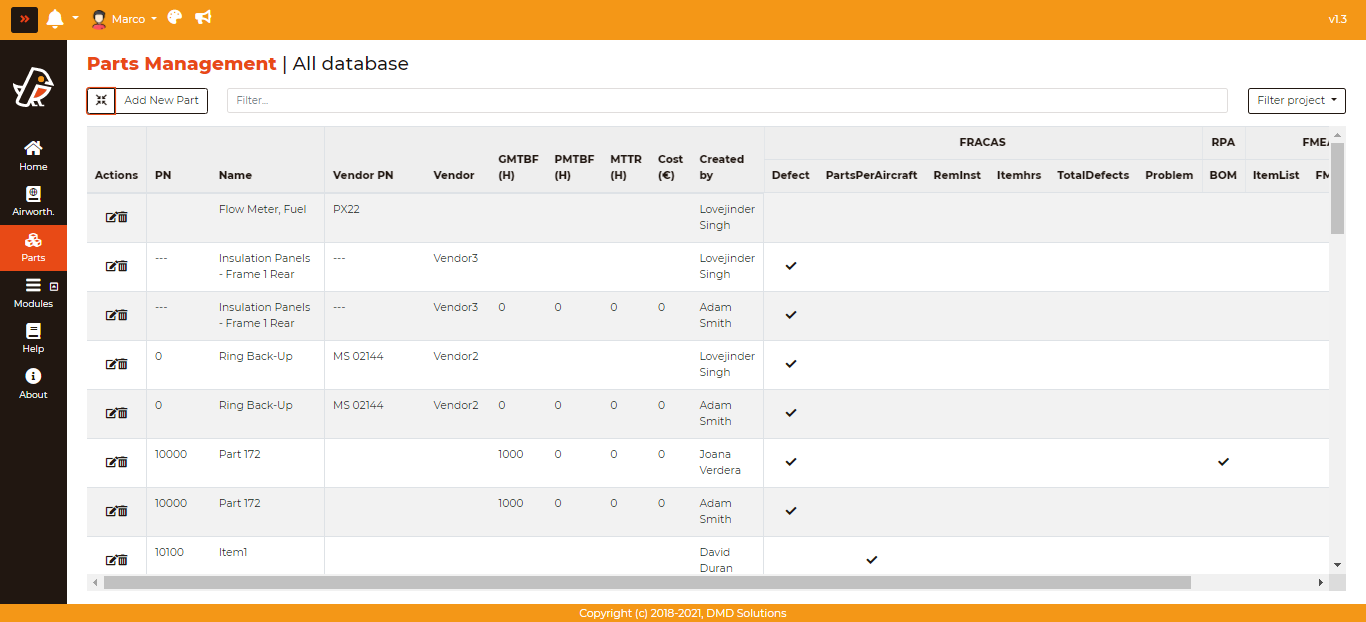
Expanding/Minimizing: Unlike the first image of this section, which has the table minimized, the image above is expanded. When expanded, one can view the parts’ GMTBF, PMTBF, MTTR, Cost and author. This is achieved by clicking on the expand button, which is located on the top left corner of the screen.

Add New Part: You can add new parts to use in the modules or match a PN in order to modify an existing part.
Filter search bar: Through the filter search bar located over the table, one can filter by PN. In addition, it uses wildcard rules, which means that the user can type an asterisk (*) on either the left, right, or both sides of the searched term. When on the left side, it means that the user wants to filter down to PNs that end with the term. When on the right side, it means that the user wants to filter down to PNs that start with the term. When on both sides, it means the user wants to filter down to PNs that contain the term.
Filter Project: Located over the rightmost side of the table, one can filter by project through the dropdown.
Modify/Delete: Through these icons under the column labeled “Actions”, you can modify the same details as those that can be modified when adding a part, in addition to deleting existing parts.
Note
To modify parts, you must have modifying permissions for at least one of the modules that the specific part is used in. To delete parts, you must have deleting right to all modules that the specific part is used in.